
Investing in high-quality siding requires proper cutting techniques to ensure its durability and appearance. Many DIY enthusiasts underestimate the importance of correctly cutting Hardie board siding, leading to compromised projects. Knowing how to cut this versatile material properly ensures your siding project is both beautiful and long-lasting.
Tools and Materials You Will Need
Essential Tools
To start, gather the necessary tools: a circular saw with a fiber cement blade, a jigsaw for detailed cuts, a measuring tape, a square for straight cuts, and a pencil for marking measurements.
Safety Gear
Safety gear is crucial. Wear safety glasses, a dust mask, gloves, and ear protection to shield yourself from dust and debris, protect your hands from sharp edges, and guard your hearing against loud saw noises.
Additional Supplies
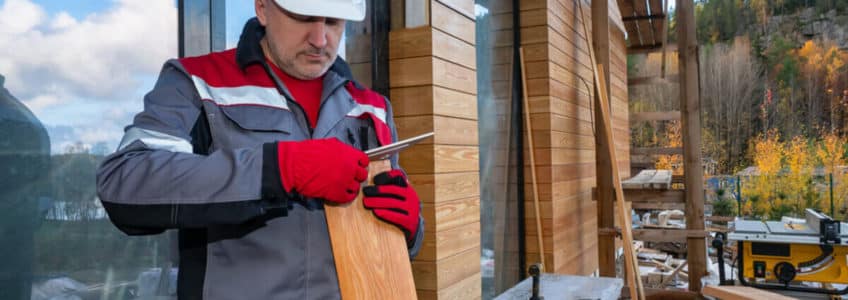
Ensure you have enough Hardie board siding, and set up a pair of sawhorses for stability. Use clamps to secure the siding while cutting.
Preparing for the Cut
Measure Twice, Cut Once
Before you start cutting, take the time to measure and mark your Hardie board siding accurately. Using a measuring tape, note the dimensions you need and mark them clearly with a pencil. Double-check your measurements to avoid any costly mistakes.
Set Up Your Work Area
Set up your sawhorses in a well-ventilated area, preferably outdoors to minimize dust accumulation. Place the Hardie board siding on the sawhorses and use clamps to secure it. This setup ensures stability and safety during the cutting process.
Cutting the Hardie Board Siding
Using a Circular Saw
To use a circular saw, mark the cut line with your square. Position the saw blade along this line, ensuring the saw depth is correct to cut through the siding without being too deep. Turn on the saw and guide it slowly along the marked line, keeping your hands steady to avoid chipping the material.
Cutting Curves and Angles with a Jigsaw
For non-straight cuts, such as curves or angles, a jigsaw is ideal. Draw the desired shape on the siding, place the jigsaw blade on the marked line, and begin cutting slowly. Carefully follow the line to ensure accuracy.
Finishing Touches
Smoothing the Edges
After making your cuts, the edges of the Hardie board siding may be rough. Use a sanding block or a piece of sandpaper to smooth out the edges. This step ensures a clean look and a better fit when installing the siding.
Clean Up the Work Area
Proper cleanup is essential to maintain a safe and efficient workspace. Collect all the dust and debris generated from cutting and dispose of it properly. Ensure you also clean your tools and store them safely for future use.
Installation Tips for Cut Hardie Board Siding
Aligning the Siding
When installing the cut Hardie board siding, ensure each piece is correctly aligned and leveled. Use a level to check the alignment before securing the siding to the wall.
Securing the Siding
Use appropriate fasteners recommended by the manufacturer to secure the siding. Typically, galvanized nails or screws are used. Ensure each fastener is driven in straight and does not over-penetrate the siding.
Sealing the Edges
To prevent water infiltration, apply a suitable sealant to the edges of the siding where cuts have been made. This step enhances the durability and longevity of your siding installation.
Conclusion
 Learning how to cut Hardie board siding correctly is essential for achieving a professional and durable finish for your home’s exterior. With the right tools, careful measurements, and attention to detail, you can ensure each cut is precise and clean. Follow this step-by-step guide, and you’ll be well on your way to a successful siding project that enhances your home’s curb appeal and value. For expert assistance or further questions, contact Advantage Construction today.